
Frankenstein

Hi, I’m Thomas Delariviere. A few years ago, I set out to recreate an iconic character from horror cinema: Frankenstein. Drawing inspiration from classic film references and the expertise I’ve developed over the years at TexturingXYZ, I began this project with a fully hand-sculpted character in ZBrush. The aim was to showcase how Hyperskin can enhance details by leveraging principles such as flow and the natural structure of facial pores.
The project is based on the Texturing XYZ's basemesh.
°
The entire process was carried out in Maya/Arnold. For the lookdev, I began by applying the calibrated displacement map from Hyperskin 2.0 and experimenting with different lighting setups. This approach helped me verify that the details remain consistent from various angles and that the SSS effect doesn’t excessively soften the details.
°
You can see how the details stay consistent with the model, blending perfectly with the ZBrush sculpt without taking over. Both work together seamlessly, adding an extra layer of organic and structured detail. Hyperskin 2.0 really shines here, redefining each pore and wrinkle while keeping the natural flow created in ZBrush. It’s important to provide clear guidance to ensure Hyperskin knows exactly how to align the pores and wrinkles.

My goal was to maintain Frankenstein's stylized appearance while keeping in mind that the character is made up of different pieces of skin.
Here is the result from Symbiote's displacement. The character's prominent features are fully preserved, while Hyperskin redefines the pores, wrinkles and micro details enhancing the overall quality.

°
Hyperskin 2.0 works efficiently with just a basemesh and a few maps. An 8K sculpt displacement map from ZBrush and an albedo map are all it takes to bring the project to life. Below, you can see the input textures alongside the processed output from Symbiote.

ADDITIONAL BREAKDOWN
Additional maps
Hyperlook X provides a diverse set of maps to control different aspects of the skin.
To emphasize his undead, grimy appearance, I applied a layer of dirt across the entire face. These subtle imperfections bring an added touch of realism to the model.

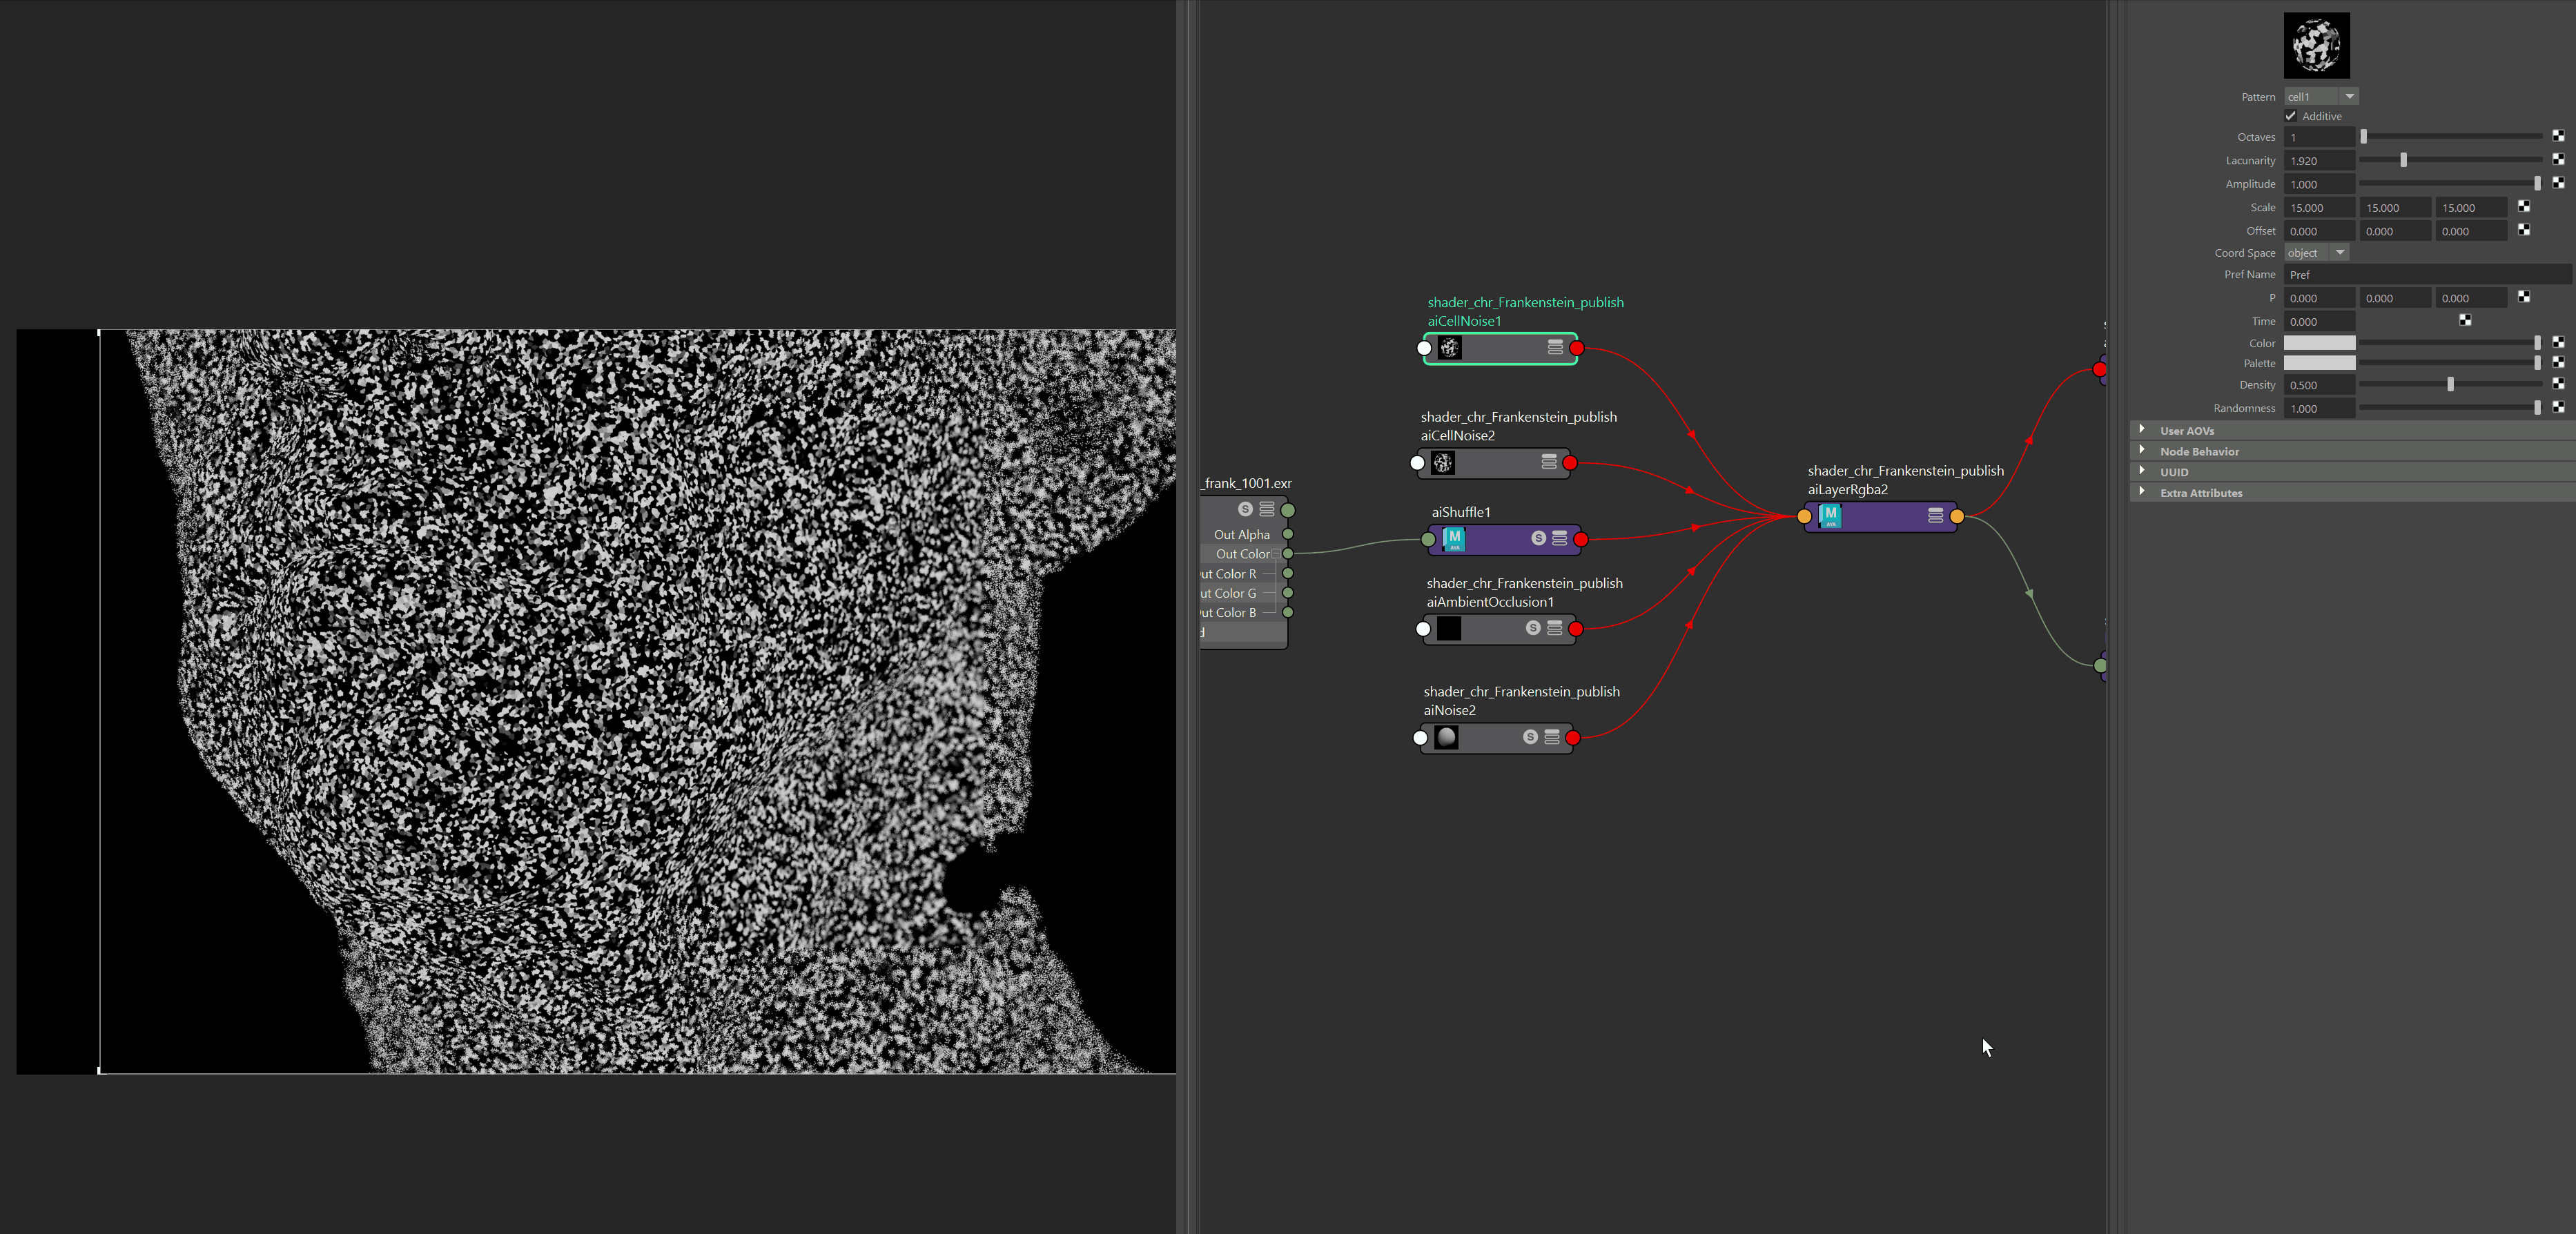
The process is straightforward: the aim is to use the utility map to add impurities and mimic dead skin on the surface. This is achieved by combining cell noise with procedural effects available directly in Arnold.
To ensure the dead skin doesn’t obscure the pores, I leverage the G channel of the raw utility map to mask specific areas. This mask is further blended with ambient occlusion to focus on targeted regions of the face. Below is the shader setup, incorporating various cell noise masks driven by the utility map.
Hyperskin 2.0 and Hyperlook X offers numerous possibilities for Artists. The displacement quality is unmatched, enhancing details in a coherent way and adding extra realism to manual sculpting.
The quality of the input data is crucial: ( the more detailed the base is, the better the system performs).
However, scanned data is not necessarily required to enhance details. Simply providing manual directional flows on different parts of the face is enough to achieve remarkable results, as Hyperskin strictly relies on input data without extrapolating.

CONCLUSION
Additional maps
Symbiote brings significant value to the project by offering a new way for artist's work. By refining specific flows of the face, it becomes easy to add all the necessary skin realism over a manual sculpt, without requiring scan system.
Designed specifically for artists, Symbiote provides all the tools needed to adjust every element during lookdev, allowing precise and flexible control over every aspect of the skin.


°